![]()
Maintenance and Repair: Restoring Veneer Surfaces After Wear and Tear
- Key Takeaways
- Assess the veneer damage
- Execute your veneer repair
- The art of invisible finishing
- Beyond the glue and patch
- Choose your repair materials
- Preserve your restored veneer
- Conclusion
- Frequently Asked Questions
- What are common signs of veneer damage?
- Can veneer repairs be done without professional help?
- What materials are needed for basic veneer repair?
- How can I make a veneer repair less visible?
- How do I prevent veneer from getting damaged again?
- Is it possible to repair water-damaged veneer?
- How long will a veneer repair last?
Key Takeaways
- Understanding the nature and source of veneer damage informs targeted, durable repairs and deters future problems.
- Knowing your substrate and adhesion testing are important to achieve a good bond and great results.
- Select appropriate tools, adhesives, fillers, and finishes suited to your veneer type for easy repairs and a professional look.
- Includes step-by-step repair techniques for lifting edges, bubbles, scratches, chips, and patching sections.
- Above all, safe, penetrating handling, careful preparation and invisible finishing are the key to preserving both the function and look of the piece.
- Seal the repaired veneer by shielding it from moisture, heat, and abrasions. This helps maintain the durability and elegance of your piece.
Veneer repair is the process of fixing chips, cracks, or wear in dental veneers or wood surfaces. We frequently require veneer repair to maintain teeth or furniture and prolong their lifespan.
Veneer repair for teeth employs bonding or replacement veneers, while wood veneer fixes involve patching, sanding, or gluing. Both types save money over full replacement.
Next, learn how each approach functions and what you may require to achieve.
Assess the veneer damage
Assessing veneer damage starts with a close look at what’s gone wrong and why. Veneers can chip, peel, bubble, or discolor for all sorts of reasons, from wear and tear to how the piece was made or where it sits.
The underlying substrate and how well the veneer is attached both play a big part in how repairs should be done. This section breaks down what to check and how to spot the root cause.
Type of Damage | Description | Common Causes |
|---|---|---|
Chipping | Small pieces breaking off the surface | Physical impact, aging |
Peeling | Veneer lifting from edges or corners | Poor adhesion, moisture |
Bubbling | Raised areas or blisters | Trapped moisture, heat |
Discoloration | Faded or uneven color | Sunlight, chemical spills |
Cracking | Fine lines or splits | Dry air, substrate movement |
Identify the cause
See if the veneer’s environment is to blame. High humidity or rapid temperature swings can cause veneer to swell, shrink, or pop loose. Pieces in kitchens or bathrooms usually exhibit moisture damage first.
Edges start peeling or bubbling. Check for dings, chips, or scratches. Heavy bumps, furniture drags, or even sharp things can gouge or break the veneer finish. Occasionally, the harm is merely on the surface, although severe dings can reveal the substrate.
Certain veneer damage occurs gradually. Over time, sunlight can bleach color, and everyday scrubbing can abrasively erode the finish. Not even the best can escape veneer cracks and peeling if the glue ages or dries out.
Moisture is a prime suspect, particularly for pieces located by windows or sinks. White marks and swelling or soft spots can indicate that water has gotten under the veneer and broken the glue bond.
Understand the substrate
How the veneer is doing counts. Veneers are commonly adhered to solid wood, plywood, particleboard, or MDF (medium-density fiberboard). Every substrate responds to stress differently.
Take the veneer damage for instance. Plywood plays it pretty safe with moisture, while particleboard will swell and crumble if it gets wet. A composite or MDF substrate could require specific glues or preparation, while solid wood might only require cleaning before repair.
Examine the veneer damage and check for stains, rot, or soft patches. These indicate the substrate requires attention before repairing the veneer. If the furniture’s been repaired in the past, previous fixes can leave uneven glue, fillers, or patches that impact your new work.
Scrape or sand lightly to expose and identify any underlying problems.
Test for adhesion
Attempt to pull up the veneer with your fingers along edges and corners. If it lifts easily, the glue is weak. Press on various sections, particularly bubbled or raised looking areas.
If it flexes or sounds hollow, the glue probably gave out. Edges tend to be the early warning. Look for narrow openings, strip lifts or splits. These areas require immediate action to prevent the issue from spreading.
Monitor all loose spots. Detailing what areas are peeling or lifting assists in repair planning and ensures no vulnerable area goes overlooked.
Execute your veneer repair

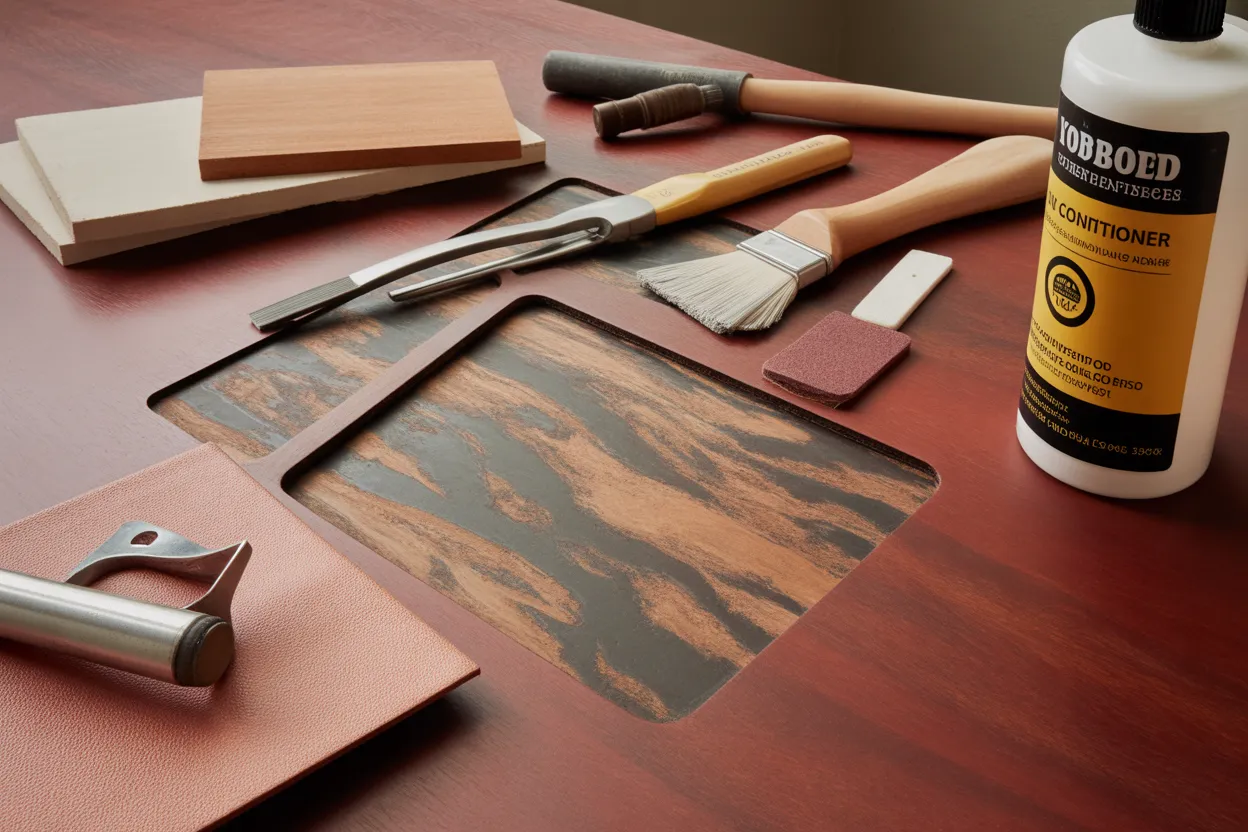
Your veneer repair begins with a plan and preparation. Gather these tools and materials: sharp utility knife, wood glue or adhesive, clamps, fine needle, adhesive syringe, microfiber cloth, scratch remover, wood filler or epoxy, putty knife, sanding block, matching polish, veneer patch, and a clear coat finish.
Wear gloves and a mask when handling glues, as some fumes or contact can irritate. Wipe the veneer damage with a damp, lint-free cloth and allow to dry before repair steps.
1. Lifting edges
Take a sharp utility knife and carefully pry up the loose veneer edge, being careful not to split or crack it further. Apply wood glue or adhesive under the lifted section, ensuring it coats all the way to the corners.
Press the veneer back down, then clamp or weight it in place. Be sure to wipe off any excess glue with a damp cloth before it dries. Allow the clamps to remain during the glue’s suggested curing time for a strong and polished repair.
2. Bubbles and blisters
Pop the veneer bubble with a pin. Pull some glue into a syringe and inject it cautiously into the area you punctured.
Press the bubble flat with your cloth or roller, spreading the glue inside. Weight or clamp it down until it cures. Wait until the glue has dried completely before sanding or finishing.
3. Minor scratches
Wipe the scratch with a microfiber cloth to remove dust or debris. Buff with a wood scratch remover in small circles. If the scratch is still there, do it again.
Some deeper scratches require a second round. If needed, touch up your veneer repair with a thin coat of wood polish, reviving the color and shine and seamlessly blending the damage into the rest of the veneer.
4. Chips and gouges
Fill chips and gouges with wood filler or epoxy, pressing it in with a putty knife and smoothing it flush with the surface. For optimal results, select a filler color that most closely resembles the original veneer.
Allow the filler to dry. This may take a few hours or it might take overnight. Sand the spot until it is flush with the surface.
5. Patching sections
Cut a veneer patch to the same size and shape as the damaged area, following the original grain direction. Glue the patch and press it.
Once dry, sand the edges so it blends into the surface. Then, add a clear coat to protect and finish. This helps the patch last and look natural.
The art of invisible finishing
The magic of invisible finishing in veneer repair is that you make repairs so impervious that no one ever sees the repair work. This craft requires experience and a keen eye. The idea is to blend in with the original surface’s look, feel, and shine.
Knowing when to repair is as valuable; occasionally, you can ruin a small defect by repairing it. The invisible finishing is knowing when to stop. The best results come with the right products, tools, and methods for the job.
Key techniques include:
- Choose repair materials that match the appearance and texture of the original veneer.
- Layer finishes to build lasting depth and protection.
- Let each finish layer dry fully before adding another.
- Use card scrapers for smooth, flat blending.
- Consider repair size and thickness to steer your decisions.
Grain matching
Just matching the wood grain is one of the hardest parts of invisible finishing. Select a veneer sheet with a grain pattern close to the original. Minute accents are everything; direction, width, and spacing of the lines need to correspond.
With a veneer punch, cut patches, making sure the grain runs the same way on the patch and base. It’s a handy tool that assists you in cutting shapes that nestle perfectly into missing or damaged spots.
When you glue the patch, feather the edges by sanding lightly so the join is less visible. Other times, a wood stain might lend a bit more pop to the grain. The right stain will blend the patch and the main piece into one.
Color blending
Achieving the perfect color requires not just patience, but attention! Stir stains or finishing products until you reach a tone similar to the original veneer. Always try your mix on a scrap piece first; wood can change once it dries.
Paint multiple thin coats of color instead of one thick one. In this way, you can layer up to the perfect color and pause before it gets too deep. After each coat, clear away excess stain with a clean rag.
This aids in maintaining even color and prevents it from feeling too saturated. Pile on layers only as necessary, checking the color match after each. Building color gradually is safer than repairing the damage of a color load done in haste.
Sheen replication
Sheen in the finished surface is crucial. Discover if the original is matte, satin, or gloss before you begin. Finish with a matching product. To create an invisible finish, the final finish must have the same sheen as the rest of the piece.
When the final coat is dry, buff it gently. Use a soft pad or cloth to blend the new finish with the old. The technique of invisible finishing aims for a light-reflecting surface that is the same on both.
Beyond the glue and patch
Veneer repair goes beyond simply sealing a crack or gluing a patch; it often involves assessing the long-term value of the piece and its personal significance. This process honors the narrative and craftsmanship inherent in every furniture piece, especially when working with natural wood veneer.
The soul of the piece
Every veneer object, be it a meeting room table or an heirloom cabinet, has a back. The veneer—the thin sheet of wood—often as thin as 0.6 mm—demands attention not only in treatment, but in listening to its narrative. There’s more to a repair than just glue and a patch.
It’s about experiencing the way the piece was constructed, the hand that crafted it, the years it has witnessed. Fix after fix, each one imprints a new part of that story. Sometimes, the best repairs are the ones that don’t attempt to erase every trace.
A tiny chip or a subtle scratch can trace the piece’s journey through years. Did you know that when they patch, the pros often like to use those shapes that blend in because perfect squares and sharp corners really make repairs stick out? Going too far with weird shapes can backfire, attracting the eye to the patch instead of letting it go unnoticed.
There’s an equilibrium at play: retain the original appeal and ensure the bit functions as it ought.
When to walk away
Not every cracked veneer needs to or should be repaired. If the damage goes deep or the coating is peeling in multiple spots, the effort to repair may be beyond the value of the piece. Sometimes the repairs cost much more than the piece is really worth, both financially and sentimentally.
For hard-core issues, such as missing chunks or warped surfaces, you’ll need a craftsman to resurrect the piece. Among the most challenging of these jobs is veneer work, which is frequently fussy and slow.
Choosing to repair or replace involves considering what it means, what it would cost to revive, and whether the repair will preserve the spirit of the piece.
The story of a scar
A fixed veneer is seldom ideal. Repair ‘scars’ can represent so much more than just harm — they can represent resilience, love and history. It’s more than just the glue and patch.
Others simply leave slight imperfections as proof of the piece’s lifelike monster, the whole thing singularly unforgettable. By embracing these scars, you can transform a basic repair into a homage to the adventure, not just a concealment.
These minor distinctions are what make the thing unique, not less.
Choose your repair materials

Repair material selection for wood veneer surfaces includes both the process and final appearance. Every decision, from glue to quality furniture polish, must align with the veneer’s particular species and state, ensuring compatibility, strength, and longevity.
Adhesives
Premium wood glue is frequently utilized to secure loose or lifting veneer, especially when dealing with thin wood layers. It offers powerful adhesion and can be found in virtually any hardware store. For some niche repairs, others prefer adhesives that are specifically designed for veneer application. These products work well in those tricky little corners where standard glue might not stick or may warp the veneer panels.
When selecting a glue, opt for one that dries clear. This prevents the repair from shining through light woods or aged surface wood. Always read the directions on the glue’s packaging, as some need to be clamped for a period of time while others cure with little pressure.
If you want to bond two pieces of veneer together, a specialty adhesive simplifies achieving a clean, seamless line. This joint is crucial to get right, as once the glue sets, fixing any errors can be quite challenging.
- Types of adhesives for veneer repair:
- PVA wood glue
- Urea-formaldehyde resin glue
- Contact cement
- Hide glue (old-school)
- Specialty veneer adhesives
Fillers
Wood fillers come in several varieties. Some can be sanded and stained, making them good for matching the color and sheen of the original veneer. If you’re fixing small chips or cracks, a stainable wood filler does the trick.
Bigger cracks or gouges might require epoxy filler, which is tough and fills voids without shrinking. Shrinkage is the bane of some fillers, so it’s smart to pick products marked “non-shrinking.
I always test the filler on a concealed area first to make sure it won’t react badly with your veneer. Work in thin layers, letting each one dry before adding more. This reduces shrinkage and allows you to bulk up the area for a smooth, flat finish.
Sanding between each layer eliminates bumps and helps merge the repair with the rest of the veneer.
Finishes
The appropriate finish safeguards your fix and contributes to the style. Some are transparent and discreet. Others have a satin or glossy shine.
Here’s a quick guide:
Finish Type | Characteristics | Best For |
|---|---|---|
Polyurethane | Durable, water-resistant | High-traffic surfaces |
Shellac | Natural, easy to repair | Antique or fine veneer |
Lacquer | Quick-drying, high gloss | Modern furniture |
Oil-based varnish | Deep color, good protection | Table tops, woodwork |
Water-based clear finish | Low odor, dries clear, easy clean-up | Light woods, interiors |
A transparent topcoat protects the repair from future damage. Experiment with tools—brushes, cloths, spray—to apply finish in a way that feels best with your surface.
Allow each coat to dry completely. This keeps the finish smooth and bubble-free, assisting it to blend with the remaining veneer.
Preserve your restored veneer
Veneer repair can revitalize old or damaged furniture. Maintaining that newness requires some foresight and maintenance. Veneer is thin and requires tender care, so every little step counts. With the right care, your veneer can stay beautiful and last for years to come.
To protect your veneer, consider the following tips:
- Wipe spills right away with a soft, dry cloth.
- Protect your revived veneer. Install UV-filtering curtains or blinds if your furniture is near a window.
- Maintain the room’s humidity between 40 and 60 percent with a humidifier or dehumidifier. Veneer will swell or shrink if the air is too wet or too dry.
- No hot dishes or wet cups directly on the veneer. Protect your refinished veneer. Always use coasters, mats, or pads to prevent heat and moisture from damaging the finish.
- Avoid harsh cleansers or abrasive scrubbers. Dust with a soft cloth and when necessary, clean with a mild soap solution.
- For a deeper clean or extra shine, apply a premium wood polish. Select one designed for veneer and adhere to the label directions.
- Top it off with a clear, protective finish, such as a water-based polyurethane, to protect your veneer from scratches and stains. This is useful for heavily used surfaces such as tables or desks.
- Keep your veneered items in a dry, cool environment. Never store them in a basement or attic where heat and moisture accumulate.
- Don’t pile heavy objects on veneered surfaces because weight can crush or crack the thin layer.
- About: Maintain your refurbished veneer. Lift rather than drag to prevent chips or cracks.
Regular upkeep counts for more than you might think. A light dust here and there and some proper cleaning habits just might keep you from some serious repair work down the road. If your veneer should ever chip or peel, attempt to patch or repair with a matching type and color. This keeps the appearance uniform and the repair less obvious.
Hot hide glue is great for regluing loose veneer. It sticks quickly and hard when you grind the two pieces of wood together with glue in the middle. Now that it’s clamped, leave the repair to set for a full night. This ensures the repair stands the test of time.
A few daily habits can really help preserve your restored veneer. Being mindful of temperature, light, and moisture, along with proper cleaning products, will keep your veneered beauties going strong for decades with minimal fuss.
Conclusion
Veneer repair doesn’t have to be hard when you have defined steps and the proper tools. Something like glue or a quick patch is just going to help them not spread. Through some careful sanding and stain, it really disguises the repair. Basic care such as dusting and keeping dry preserves veneer for years. Even the old ones can look like new with a little effort and the proper application. Many attempt these fixes on their own or bring in an expert for larger jobs. For additional advice or assistance with other repairs, see our guides or get in touch with your questions. Let’s get started and find out how little steps can revive wood.
Frequently Asked Questions
What are common signs of veneer damage?
Check for peeling, cracks, and chips on the wood veneer surfaces. Early detection of loose spots saves additional damage.
Can veneer repairs be done without professional help?
Yup, small repairs on wood veneer surfaces can be done at home with the proper equipment and materials, while extreme damage is best left to professional furniture restorers.
What materials are needed for basic veneer repair?
Common supplies include wood glue, clamps, a utility knife, fine sandpaper, and quality furniture polish to ensure a smooth finish for your veneer repair.
How can I make a veneer repair less visible?
Make sure to match the repair materials to the original wood veneer surfaces. Sand and skim it smooth for a smooth finish, then top it with a quality furniture polish.
How do I prevent veneer from getting damaged again?
Veneer repair Caring for your veneer – maintain dry surfaces, use coasters and don’t rest heavy or sharp objects directly on veneer. Routine cleaning and careful handling maintain the finish.
Is it possible to repair water-damaged veneer?
Yes, it’s contingent on the severity of the damage. Light water rings on wood veneer surfaces can be sanded out and refinished, while excessive swelling or peeling might require patching or replacement of the thin wood layer.
How long will a veneer repair last?
A good repair using quality furniture polish and proper materials will last for years, especially when the furniture is well cared for.